Quick Links
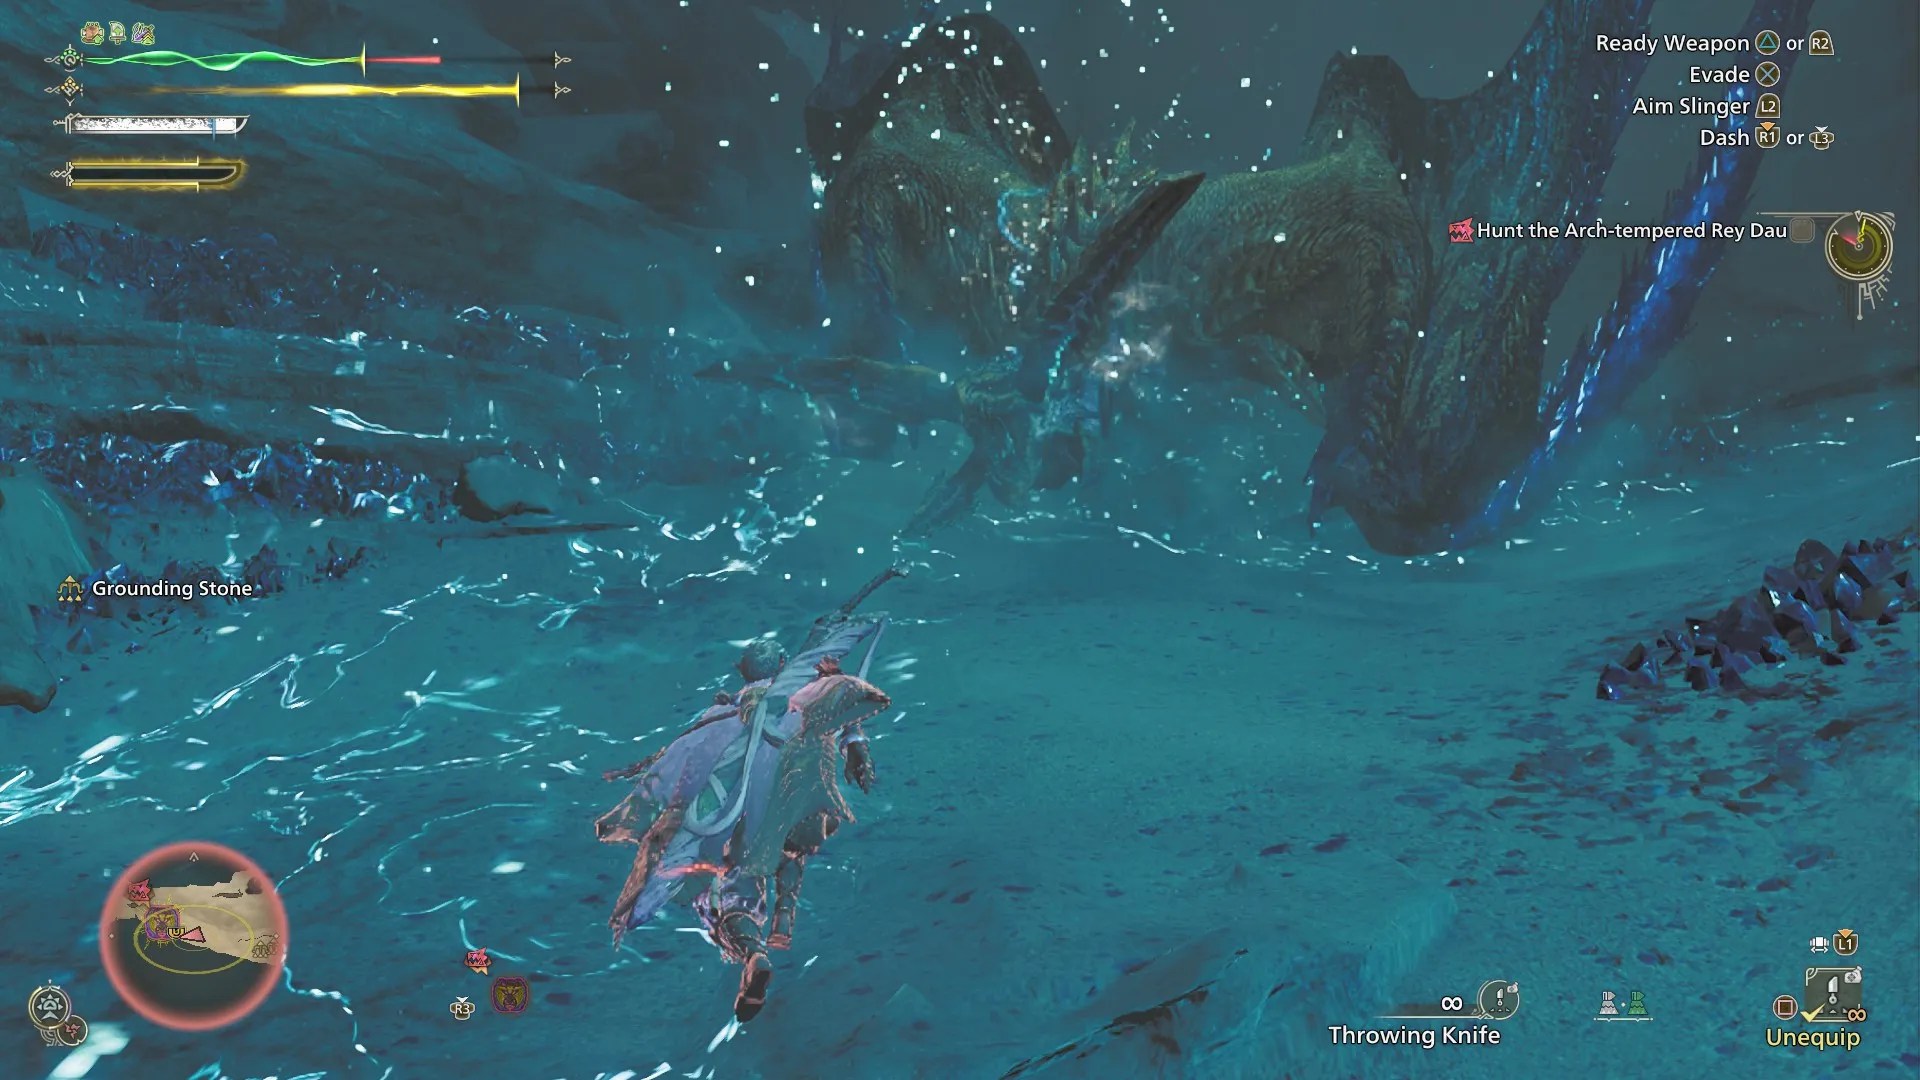
Rey Dauis the first monster inMonster Hunter Wildsto get an Arch-Tempered version, setting a fast and furious tone for future combat encounters. While AT Rey Dau is still more or less the same as the regular and Tempered versions, it is significantly more aggressive and hits much harder.
If you’re already used tofighting a Rey Dau inMH Wilds, then you can expect the Arch-Tempered version to feel very similar, albeit cranked up in terms of speed and power. Regardless, here are a few tips and reminders to help you clear the AT Rey Dau fight more easily.
How to Fight AT Rey Dau in Monster Hunter Wilds
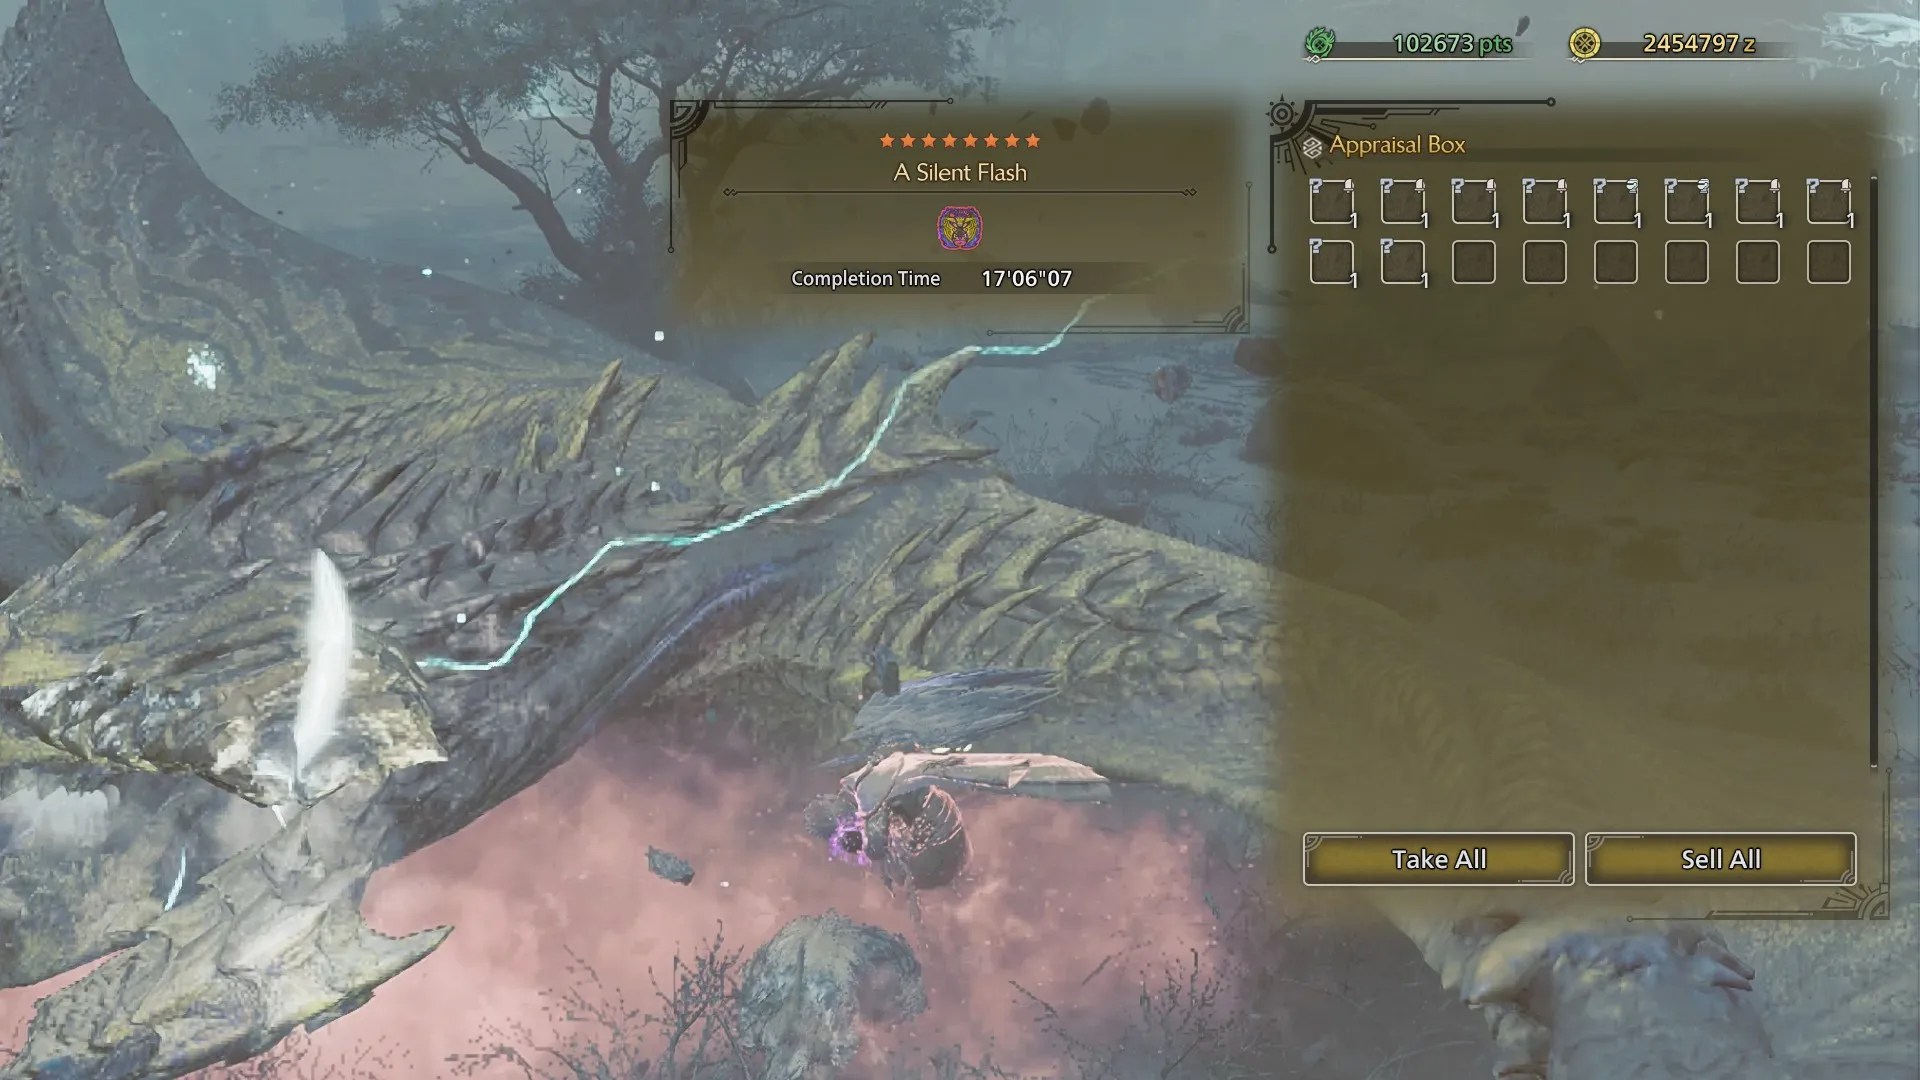
As of writing, players can hunt an Arch-Tempered Rey Dau by doing theA Silent Flash Event Quest, which runs from April 29 to May 13. Players who miss this event will eventually get to try it again once Capcom reruns it.
A Silent Flash is also locked behind an HR 50 requirement, so if you haven’t finishedtheMH Wildscampaign yet, you’ll need to do that and get your Hunter Rank to 50 before you can challenge the Arch-Tempered Rey Dau.
AT Rey Dau Fight Tips and Tricks
Arch-Tempered monsters are more aggressive, deal more damage, and have more health than their other counterparts, so you’ll need to bring an optimized build to not only survive their attacks, but to also take the AT monster down before the mission timer expires.
Weaknesses and Recommendations
Weaknesses and hit zones of a regular Rey Dau apply to the AT version, sobring an Ice Element weapon and aim for the head. The Rey Dau has a two-star Ice weakness to its head, and a one-star weakness to every other element everywhere else. Don’t feel too pressured to bring an Ice weapon, though. Other elements will still be decent against it.
For armor, we strongly recommend a set with decent Thunder resistance. The Zoh Shia set is excellent for this fight, especially if you’re using a weapon that can block like the Sword and Shield and Lance.

Jin Dahaad weapons are great if you want to deal high Ice damage, though Hirabami gear can also work well in a pinch.
Stun Status
Since AT Rey Dau hits harder and more often, you can expect to get Stunned more easily, especially when you’re affected by Thunderblight. While Stunned, you’ll be vulnerable to the Rey Dau’s biggest attacks, potentially carting you in one hit.
You can shake yourself back to normal by spamming your movement inputs while Stunned, or you can completely prevent the Stun status byusing the Stun Resistance armor skill, which you can get from Steadfast Jewels or specific armor sets.

Key Openings
You can expect fewer openings in general when fighting any Arch-Tempered monster. Because of this, you’ll want to know which of your own attacks are safe to use during or after your target’s actions. When fighting a Rey Dau, keep a mental note of the following attacks:
AT Rey Dau Openings
Double Wing Slash
When the Rey Dau slashes its wings across the ground, you can dodge toward it and hit its legs or head with a few quick attacks. Mind the crackling lightning from the ground that its wings hit.
Charged Railgun Shot
When the Rey Dau charges its horns to fire a strong lightning blast, immediately run toward it. After the Rey Dau fires, it will land and take a moment to compose itself, giving you a chance to hit its head for free.Attack the head as much as you’re able to during this time.
Backflip Wing Slam
You have a brief moment to land some hits after the Rey Dau does its flying wing slam attack (which it does after doing an aerial backflip), so long as you dodge it.
Tail Slam
When the Rey Dau slams its tail,rush its legs or head. The tail will create lightning blasts on the ground it hits, making it hard to hit the tail itself with melee weapons.


